
 Dịch
Dịch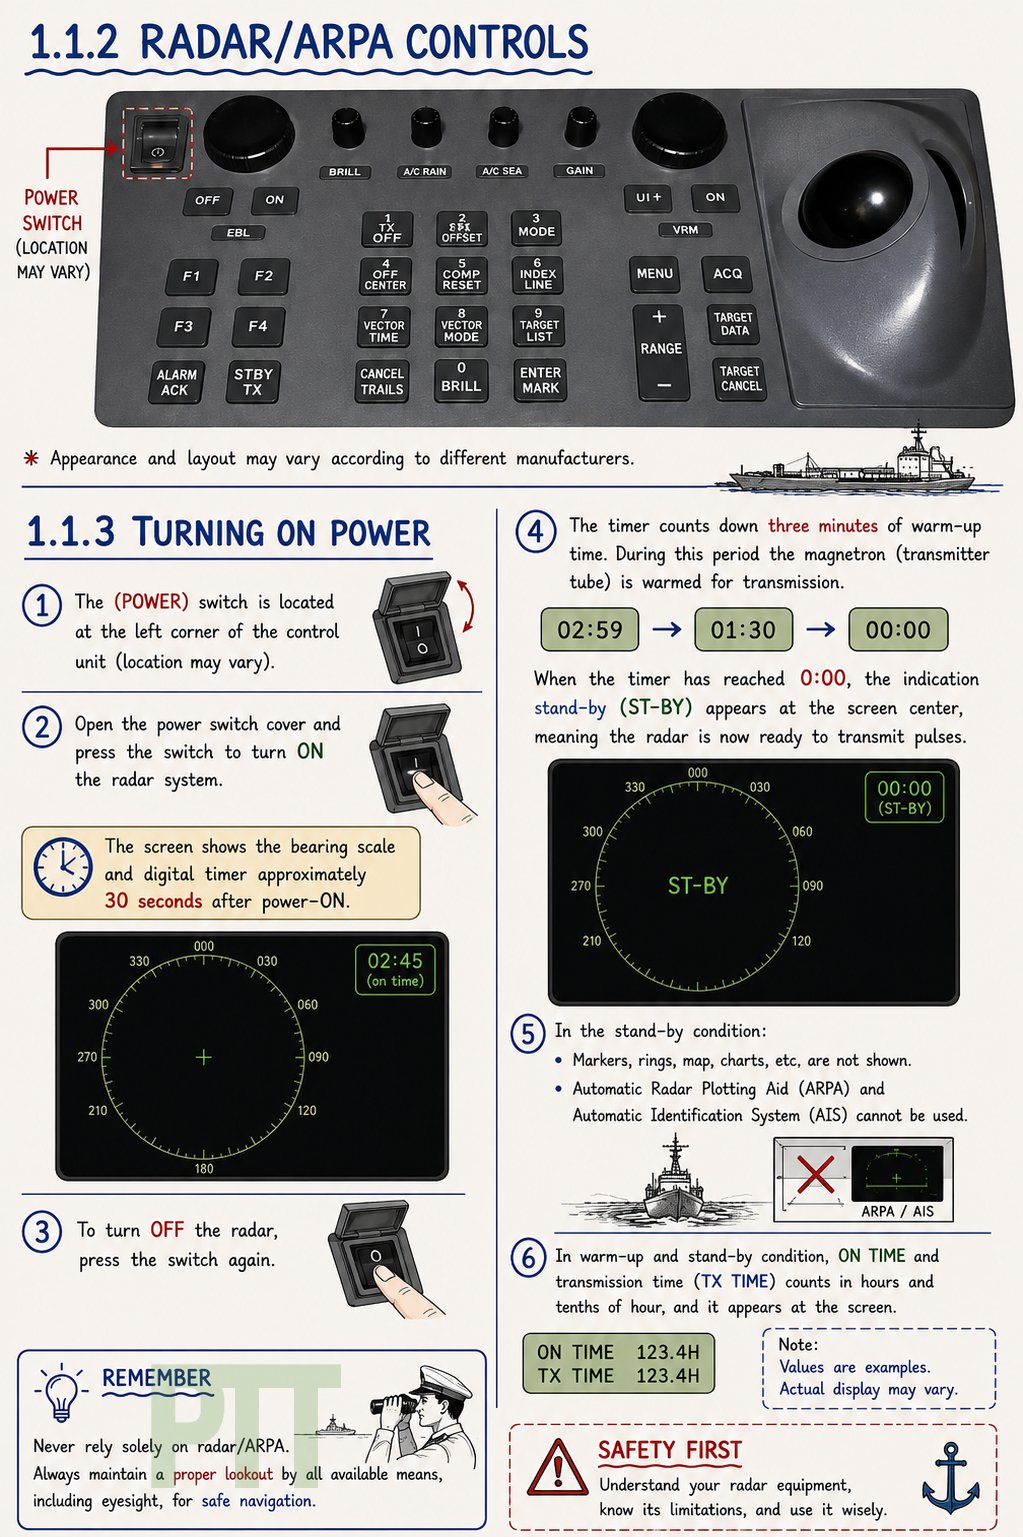
📡 RADAR/ARPA CONTROLS — TURNING ON THE RADAR
Knowing the controls of your specific radar is essential for safe and effective bridge watchkeeping.
Starting the radar
1️⃣ Locate the radar POWER switch. Its position and design vary between manufacturers.
2️⃣ Open the protective cover, if fitted, and switch the equipment ON.
3️⃣ Allow the radar to complete its warm-up period. The screen may initially display the bearing scale and a countdown timer.
4️⃣ Once warm-up is complete, the radar normally enters STANDBY — ST-BY mode.
5️⃣ Select TRANSMIT — TX only after confirming that it is safe to operate the scanner and transmit radar energy.
- ️ The illustrated three-minute warm-up period is only an example. Actual warm-up time, controls and indications depend on the radar model and manufacturer’s instructions.
Standby mode
When the radar is in standby:
The transmitter is not sending radar pulses.
Radar echoes and ARPA tracking are unavailable.
Stored marks, maps or charts may not appear, depending on the equipment.
The scanner may not rotate.
AIS is an independent system and may remain operational elsewhere on the bridge. However, AIS targets may not appear on an integrated radar display while that radar is in standby.
Before transmitting
- Check that nobody is working near the radar antenna.
- Confirm that the scanner is clear of obstructions.
- Select a suitable range scale.
- Adjust gain, sea clutter and rain clutter carefully.
- Verify heading, speed and position inputs.
- Test alarms and confirm correct operation.
- Follow the equipment manual and the vessel’s procedures.
Remember: control layouts differ between manufacturers. Never assume that another radar operates in exactly the same way.
Understand your equipment, recognise its limitations and always maintain a proper lookout.